Facebook has proven to be so much more than a place to keep up with friends and family. Today, this social media platform has shown its power as an effective marketing tool, capable of vastly elevating how lawyers connect with and attract clients. With billions of active users, Facebook offers an unparalleled opportunity to target potential clients with precision and finesse. But navigating the complexities of Facebook advertising can be overwhelming, especially for legal professionals who may not be familiar with the ins and outs of digital marketing.
While Facebook ads for lawyers can be complicated to navigate, our experts know just how you can employ this tool to your benefit. Our team at Comrade Digital Marketing created this step-by-step guide designed to simplify the process and help you unlock the full potential of Facebook ads for your legal practice. From crafting compelling ad copy to selecting the perfect audience, we’ll walk you through each phase of creating an effective ad campaign that not only reaches your ideal clients but also converts them into loyal customers. Dive in and discover how to leverage Facebook ads to elevate your legal practice and stand out in a crowded market.

Why Lawyers Should Use Facebook Ads
Let’s face it – traditional marketing methods are not enough in today’s digital age. Billboards aren’t read as much and TV ads are skipped through. Thankfully, Facebook ads offer a dynamic and highly targeted approach to reaching potential clients. Here are seven compelling reasons why every lawyer should consider incorporating Facebook ads into their marketing strategy, unlocking the potential to expand their reach and client base like never before:
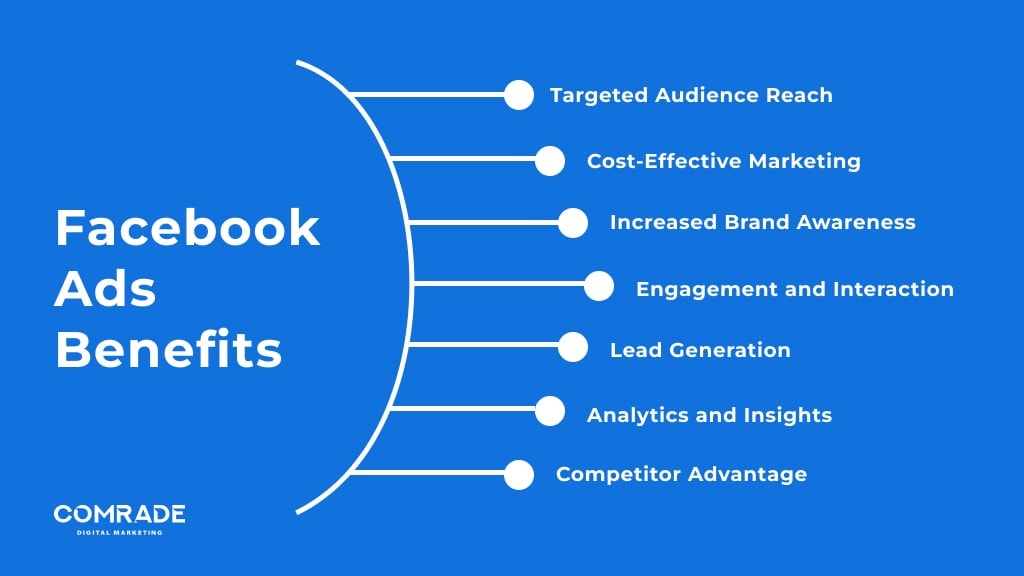
Targeted Audience Reach: Facebook ads allow lawyers to reach specific demographics, including age, location, interests, and behaviors, ensuring their ads are seen by potential clients who are most likely to need their services.
Cost-Effective Marketing: Compared to traditional advertising methods, Facebook ads offer a more affordable option with flexible budgeting, enabling lawyers to control costs and adjust spending based on ad performance.
Increased Brand Awareness: By consistently appearing in the newsfeeds of potential clients, Facebook ads help lawyers build and maintain brand awareness, making their services more recognizable.
Engagement and Interaction: Facebook ads encourage direct interaction with potential clients through comments, likes, and shares, fostering a sense of community and trust.
Lead Generation: With features like lead ads, lawyers can easily collect contact information from interested parties, streamlining the process of acquiring new clients.
Analytics and Insights: Facebook provides detailed analytics on ad performance, allowing lawyers to measure the effectiveness of their campaigns and make data-driven decisions for future marketing efforts.
Competitor Advantage: By utilizing Facebook ads, lawyers can stay ahead of competitors who may not be leveraging this powerful platform, capturing a larger share of the market.
Harnessing the power of Facebook ads can transform a lawyer’s marketing efforts from ordinary to extraordinary. By leveraging targeted reach, cost-effective strategies, and insightful analytics, lawyers can connect with potential clients more efficiently and effectively. Don’t miss out on the opportunity to stay ahead of the competition and build a stronger, more recognizable brand. Start using Facebook ads today and watch your practice thrive.
Comrade Digital Marketing Agency can help you with the above if you’re unsure how to go about it. Schedule a free consultation.
How Much Lawyers Should Budget for Facebook Ads
When determining a budget for Facebook ads, lawyers should consider the competitive nature of the legal industry and the specific goals of their campaigns. On average, legal professionals might allocate between $1,500 to $3,000 per month for Facebook ads. This budget allows for sufficient reach and frequency to make an impact in a competitive market. However, for those targeting highly competitive areas like personal injury law or large metropolitan markets, budgets might need to increase to $5,000 or more monthly to achieve the desired results.
Factors influencing the budget include the geographical location, the type of legal services offered, and the competition within those niches. Cost per click (CPC) for legal ads can range from $1 to $10, significantly higher than other industries. Therefore, a well-optimized ad campaign with a clear strategy focusing on target demographics, compelling ad creatives, and effective landing pages is essential to maximize the return on investment (ROI) for the budget allocated. Regular monitoring and adjustment of the campaign are also crucial to ensure the budget is being used effectively to generate leads and conversions.
Your Step-by-Step Process for Crafting Your Facebook Ad
Every great practice needs a steady flow of new clients, and with Facebook ads, you can ensure your client book remains full. Our detailed step-by-step guide on Facebook Ads for lawyers is here to help. Learn how to craft effective ads and reach potential clients with precision. Read our guide now and take the first step toward a stronger, more successful practice!
Step 1: Set Up Your Facebook Ads Manager Account
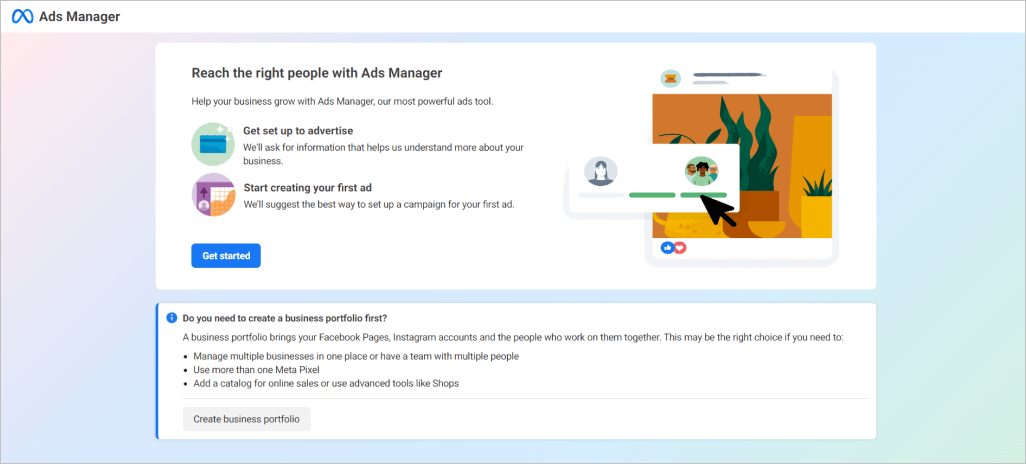
Before you can launch effective Facebook ads for your legal practice, you need to set up your Facebook Ads Manager account properly. This initial setup is critical for managing your campaigns efficiently and ensuring seamless ad delivery. Follow these steps to establish your Ads Manager account and prepare for successful advertising:
Log in to Facebook: First, make sure you are logged into your Facebook account. If you don’t have an account, you will need to create one.
Access Facebook Ads Manager: Go to Facebook’s Ads Manager by clicking on the drop-down arrow in the top-right corner of your Facebook homepage. Select “Ads Manager” from the menu. Alternatively, you can visit facebook.com/adsmanager directly.
Set Up Your Business Account: If you haven’t set up a business account yet, you’ll be prompted to create one. Follow the on-screen instructions to input your business name, address, and other relevant information. This step is crucial for managing your ads effectively and for billing purposes.
Complete the Payment Setup: In Ads Manager, navigate to the “Payment Settings” under the “Business Settings” menu. Here, you will need to add a payment method (credit card or PayPal). This is essential to fund your advertising campaigns.
Review Your Account Settings: Ensure that all settings, including contact information and business details, are correct. This helps in managing ad campaigns and ensuring you receive notifications and reports.
Once you’ve completed these steps, your Facebook Ads Manager account will be ready to use. You’ll be well-equipped to create targeted ad campaigns, track performance, and manage billing. With your account properly set up, you can focus on crafting compelling ads that attract potential clients to your legal services.
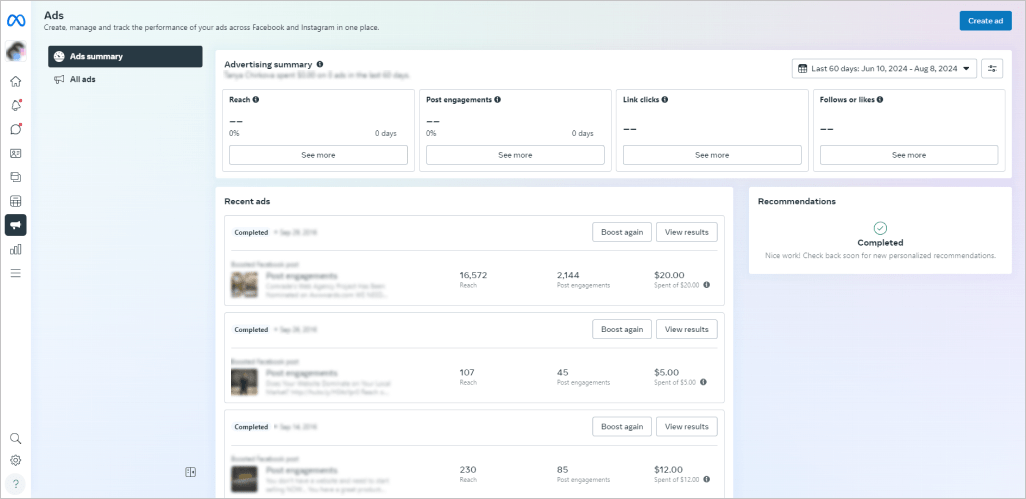
Step 2: Begin the Ad Creation Process in Facebook Ads Manager
To start creating ads, first log into your Facebook Ads Manager. Upon entering, you’ll be greeted by a performance dashboard. This dashboard displays all of your campaigns, ad sets, and ads, along with their respective results for your law firm’s Facebook page. If this is your first time using Ads Manager, your dashboard will initially be empty, reflecting that no ads have yet been created or run.
To kick off the ad creation process, you’ll need to select the type of ad you want to create. The dashboard allows you to view different ad types and their performance metrics. Locate the green “Create” button positioned to the far left of these ad types. Clicking this button will initiate the process of setting up a new campaign, ad set, or ad.
From this point, you’ll follow the prompts to define your Facebook advertising campaign objectives, target audience, budget, and ad creative. The Ads Manager interface will guide you through each step, allowing you to build and customize your ads to effectively reach your intended audience and achieve your advertising goals.
Step 3: Select Your Buying Type
Whenever you’re creating a Facebook ad campaign, keeping your budget in mind is essential. This is where selecting the right buying type for your Facebook ads comes into play. In this step, you’ll select the buying type that aligns with your law firm’s advertising goals. Each option has its advantages, so understanding the choices will help you make an informed decision for your campaign:
Choose Your Buying Type: Once you’re in the campaign setup, you will need to select your buying type. Click on the “Buying Type” dropdown menu. You will typically have options such as “Auction” or “Reach and Frequency.”
Select “Auction”: For most law firms, “Auction” is the preferred buying type as it allows for more flexibility and control over bidding and budgeting. This option enables you to bid for ad placements in real-time, based on your budget and target audience.
Review Your Choice: Ensure that you understand how the chosen buying type will impact your ad delivery and costs. The “Auction” buying type generally provides the most cost-effective way to reach your target audience, but it requires active monitoring to optimize performance.
By selecting the appropriate buying type, you set the foundation for how your ads will perform and how effectively you can reach potential clients. For most law firms, opting for the “Auction” buying type offers flexibility and cost efficiency. Regularly reviewing and optimizing your choice will help you get the best results from your advertising efforts.
Step 4: Define Your Campaign Objective
Defining your campaign objective is a crucial step in setting up Facebook ads for your law firm. This choice determines how your ads will be optimized and measured. By aligning your objective with your specific goals, you can tailor your campaigns to effectively attract and engage potential clients:
Select Your Campaign Objective: In the campaign creation process, you’ll be prompted to choose an objective that aligns with your goals. Click on the “Campaign Objective” dropdown menu to see the available options.
Choose an Objective: For lawyers, common objectives include:
Lead Generation: Ideal if you want to collect contact information from potential clients directly through Facebook forms.
Website Traffic: Useful if you want to drive Facebook users to your website, perhaps to a landing page or blog post.
Engagement: If you want to increase interactions with your content or page, this could be a suitable choice.
Set Up Conversion Tracking: Depending on the objective you choose, you may need to set up conversion tracking. For instance, if you choose “Website Traffic,” ensure that Facebook’s Pixel is installed on your website to track user actions and conversions.
Selecting the right campaign objective ensures that your ads are designed to meet your strategic goals. Whether you aim to generate leads, drive website traffic, or boost engagement, setting up conversion tracking helps you measure success and make data-driven adjustments. This foundation is key to achieving effective and measurable results from your Facebook marketing efforts.
Delivering Business Results: Our Digital Marketing Case Studies


Step 5: Assign a Name to Your Campaign
Now it’s time to give your ad campaign a name that packs a punch and aligns with your firm’s goals. Instead of a generic label, go for something that clearly reflects both your brand and your campaign’s purpose. For instance, if your law firm is “Justice League Attorneys” and your goal is to drive traffic, you might name your campaign “Justice League Traffic Surge.”
A catchy and specific name not only makes your campaign stand out but also helps you stay organized and focused. By incorporating your firm’s name and campaign objective, you ensure that tracking and analyzing your ad performance is a breeze. Choose a name that resonates with your mission and makes it easy to reference your efforts in future evaluations.
Step 6: Specify Your Special Ad Category
When setting up Facebook ads for your law firm, it’s essential to determine if your campaign needs to be classified under a “Special Ad Category.” This classification is required for ads related to sensitive areas like housing, employment, or credit. Properly identifying and selecting the correct category ensures compliance with Facebook’s policies and legal regulations:
Determine if You Need a Special Ad Category: Facebook requires certain ads to be classified under a “Special Ad Category” due to legal and regulatory requirements. This typically includes categories like housing, employment, and credit.
Select the Appropriate Category: If your ad falls into one of these categories, click on the “Special Ad Category” dropdown menu and select the relevant category. For legal services, this might not always be applicable unless your ads pertain to credit, employment, or housing.
Acknowledge Compliance: Confirm that your ad complies with Facebook’s policies and legal requirements. This step helps ensure that your ads are not rejected or restricted.
Proceed to the Next Step: After specifying the special ad category (if applicable), click on “Continue” or “Next” to move forward with the ad creation process. This step ensures that your ads are properly categorized and compliant with Facebook’s regulations.
By specifying the appropriate special ad category, you ensure that your ads adhere to Facebook’s regulatory standards, avoiding potential issues with ad approval. This step not only aligns your campaign with legal requirements but also helps maintain the effectiveness of your advertising strategy. Once categorized correctly, you can proceed confidently with the rest of your ad creation process.
Step 7: Implement A/B Split Testing
Implementing A/B split testing is a powerful way to optimize your attorney Facebook ads by comparing different elements to see which performs best. This process helps refine your advertising strategy based on real data, ensuring that your ads are as effective as possible. Follow these steps to set up and run A/B tests for better campaign results:
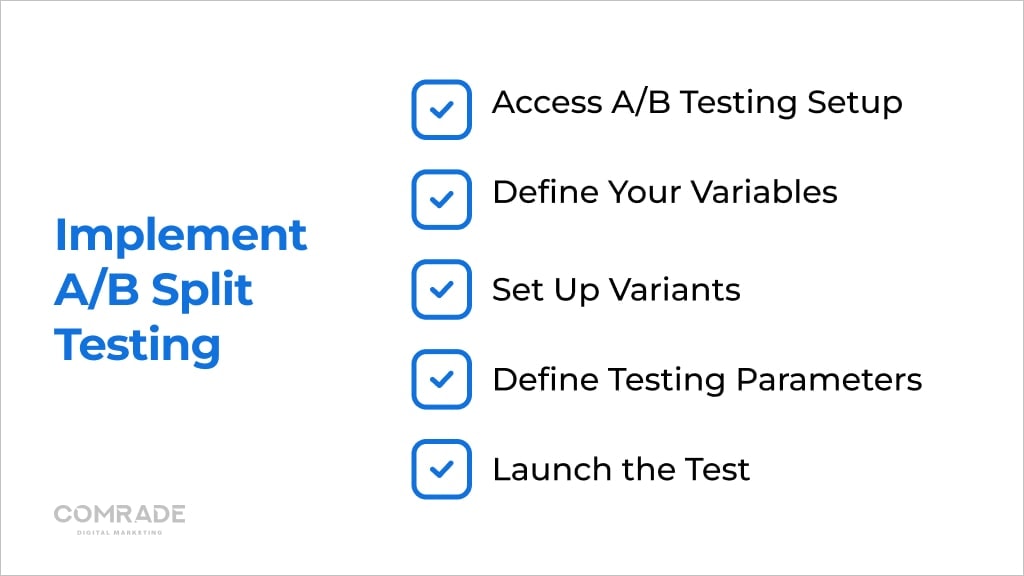
Access A/B Testing Setup: In the campaign creation interface, navigate to the “A/B Test” option. This can usually be found under the “Campaign” tab or within the campaign setup menu. Click on “Create A/B Test” to begin.
Define Your Variables: Decide on which elements you want to test. Common variables for A/B testing include:
Ad Creative: Test different images, headlines, or ad copy.
Audience Segments: Compare performance between different target audience groups.
Ad Placements: Evaluate performance across different placements, such as the Facebook News Feed vs. Instagram Stories.
Set Up Variants: Create different versions (variants) of the elements you are testing. For example, if testing ad creatives, upload multiple images or videos and set up different headlines or calls to action.
Define Testing Parameters: Determine how long you want the test to run and how the budget will be allocated among the variants. Set a reasonable duration and budget to ensure meaningful results.
Launch the Test: Once you’ve set up the variants and parameters, click on “Publish” or “Start Test.” Monitor the performance of each variant to gather data on which performs best according to your goals.
By effectively using A/B split testing, you gain valuable insights into which ad elements resonate most with your audience. This data-driven approach allows you to make informed decisions, enhancing your campaign’s performance and ROI. Once your test is complete, use the findings to fine-tune your ads for maximum impact.
Step 8: Establish Performance Goals
Beyond understanding your campaign objectives, setting clear performance goals is essential to implementing the best Facebook ad campaign for your firm. This process involves defining what you want to achieve with your ads and selecting metrics that align with your objectives. By setting specific goals, you can tailor your ad strategy to effectively drive traffic, engagement, or conversions, ensuring that your advertising efforts yield the best possible results:
Select Your Ad Set: After creating your campaign, proceed to the ad set creation stage. Here, you’ll set specific performance goals based on your chosen campaign objective.
Choose Performance Goals: For a traffic-focused campaign, you can select from various performance goals. Click on the “Performance Goal” dropdown menu to see your options:
Maximize the Number of Link Clicks: This goal aims to drive as many clicks to your website or app as possible.
Maximize Daily Unique Reach: This focuses on reaching as many unique users as possible each day.
Maximize the Number of Conversions: If your goal is to drive specific actions like form submissions or purchases, this goal is suitable.
Maximize the Number of Impressions: This goal aims to show your ad to as many people as possible, potentially increasing brand awareness.
Set Conversion Location: If you are driving traffic, choose where you want to drive your audience. Options typically include:
Website: Drive traffic to your website.
Mobile App: Direct users to download or engage with your app.
Calls: Encourage users to call your business.
Instagram Profile: Drive traffic to your Instagram profile.
Review Audience Estimates: On the right side of the setup page, review the estimated reach for your selected performance goals and audience filters. This estimate helps you understand the potential impact and adjust your settings if needed.
Finalize Your Settings: Once you are satisfied with your performance goals and reach estimates, click “Save” or “Continue” to proceed with the next steps in the ad creation process.
By carefully selecting and setting your performance goals, you ensure that your Facebook ads are focused on achieving specific outcomes. Whether you aim to drive traffic, increase reach, or boost conversions, clearly defined goals help in measuring success and optimizing your campaigns. Once your goals are set and estimated reach reviewed, you’ll be ready to move forward with creating impactful and effective ads.
Step 9: Set Your Budget and Schedule
Setting an appropriate budget and schedule is essential for managing your Facebook ad campaigns effectively. This step involves deciding how much to spend and when to run your ads to maximize their impact. By carefully configuring your budget and schedule, you can control costs and optimize your ad performance to achieve your marketing objectives:
Access Budget Settings: In the ad set creation section, locate the “Budget & Schedule” tab. Click on this tab to configure your budget and schedule.
Choose Your Budget Type: You will have the option to select between a “Daily Budget” or a “Lifetime Budget.”
Daily Budget: This sets a maximum amount to spend each day.
Lifetime Budget: This sets a maximum amount to spend over the entire campaign duration.
Set Your Budget Amount: Enter the amount you wish to spend daily or over the lifetime of the campaign. Ensure that the budget aligns with your overall marketing goals and available resources.
Define Your Schedule: Set the start and end dates for your campaign. You can also choose to run your ad continuously or within specific hours of the day, depending on when your target audience is most active.
Review and Confirm: After setting your budget and schedule, review your selections to ensure everything is correct. Click “Publish” or “Confirm” to finalize and activate your campaign settings.
Once you’ve set your budget and schedule, you ensure that your Facebook ads run efficiently within your financial and strategic parameters. Reviewing and confirming these settings helps avoid any discrepancies and ensures that your ads are executed as planned. With your budget and schedule in place, you can confidently proceed to launch your campaign and start reaching your target audience.
Step 10: Define Your Target Audience
When crafting a Facebook ad campaign, you’re likely looking to attract a specific audience in need of your law services. With this in mind, it’s critical to define your target audience to ensure you’re reaching the right people. By precisely specifying demographics, interests, and behaviors, you can tailor your ads to attract potential clients who are most likely to need your legal services. This targeted approach enhances the effectiveness of your campaigns and helps you achieve better results:
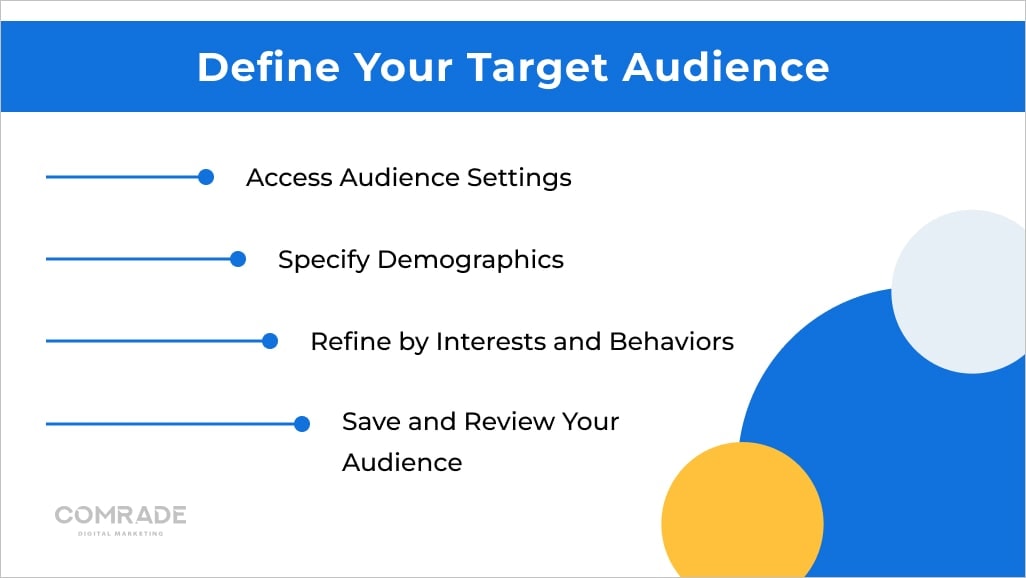
Access Audience Settings: In the Ads Manager, navigate to the “Audience” section within your ad set. Click on “Create New Audience” or use an existing one if it suits your needs.
Specify Demographics: Enter demographic details relevant to your target audience. This can include:
Age Range: Select the age range most likely to require your legal services.
Gender: Choose if your services are specific to a particular gender or if they apply broadly.
Location: Define the geographic locations where you want your ads to be shown. For lawyers, this often includes targeting specific cities or regions.
Refine by Interests and Behaviors: Use detailed targeting options to narrow down your audience based on interests and behaviors. For example:
Interests: Target users who show an interest in legal topics, personal injury, or related fields.
Behaviors: Include users who have recently engaged with content related to legal services or have shown behaviors indicative of needing legal assistance.
Save and Review Your Audience: After defining your audience criteria, save your settings. Review the audience definition to ensure it aligns with your campaign goals and target market.
With your target audience defined, you can now focus on crafting ads that resonate with the specific groups you’ve identified. Reviewing and saving your audience settings ensures that your ads are directed toward the right individuals, optimizing your campaign’s reach and effectiveness. This careful targeting sets the stage for successful ad performance and improved client acquisition.
Step 11: Decide on Ad Placement
Choosing the right ad placements is vital for reaching your target audience effectively. With vast capabilities and customizations, Facebook offers various placement options to ensure your ads are seen where they will have the most impact. Whether you prefer automatic placements for optimized delivery or manual placements for precise control, setting your ad placements correctly will enhance your campaign’s performance:
Access Placement Options: In the ad set settings, you’ll see the “Placements” section. Click on “Edit Placements” to customize where your ads will appear.
Choose Placement Types: Decide whether to use:
Automatic Placements: Facebook will automatically place your ads across its network, including Facebook, Instagram, Audience Network, and Messenger. This option can help optimize delivery based on performance.
Manual Placements: Select specific placements manually. This option allows you to choose where your ads will appear, such as in the Facebook News Feed, Instagram Stories, or within the Facebook Marketplace.
Adjust Placement Preferences: If choosing manual placements, check or uncheck the boxes for the platforms and locations where you want your ads to be shown. For example, if you want your ads only on Facebook News Feed and Instagram, select those options and deselect others.
Review and Confirm: After adjusting your placement settings, review your choices to ensure they align with your campaign objectives. Click “Continue” or “Next” to proceed with the next steps in creating your ad.
After selecting and adjusting your ad placements, you ensure that your ads are shown in the most relevant contexts for your audience. Reviewing and confirming these settings guarantees that your ads align with your campaign goals and reach the desired viewers. With placements in place, you’re ready to continue building and launching your ad campaign for maximum effectiveness.
Step 12: Configure Your Ad Set
With your campaign and ad sets ready, it’s time to dive into configuring your ads. The first step in this process is setting up your Meta account. This is crucial for managing your ad placements across Facebook and Instagram.
You’ll have the option to connect your Facebook account with Instagram. Doing so allows you to display your ads not only on Facebook but also on Instagram—either in the feed or in stories. This integration can help you reach a broader audience and tailor your advertising strategy to where your potential clients are most active.
Next, you need to decide whether you want to use an existing post or create a new ad. Facebook provides a user-friendly ad setup option for both scenarios. If you choose to create a new ad, take advantage of Facebook’s creative mockup feature. This tool lets you design and test different ad formats to see which resonates best with your audience before finalizing your choice.
By carefully setting up and testing your ads, you can ensure they effectively capture the attention of potential clients and drive meaningful engagement.
Step 13: Choose Your Ad Format
Selecting the right ad format is crucial for presenting your legal services effectively on Facebook and best displaying your firm. Each format offers unique advantages and can be tailored to different campaign objectives and creative approaches. By exploring and choosing the most suitable format, you can enhance your ad’s visual appeal and engagement, ensuring it resonates with your target audience and achieves your marketing goals:
Access Ad Format Options: In the ad creation workflow, navigate to the “Ad” level where you’ll choose your ad format. Click on “Ad Format” to see the available options.
Select an Ad Format: Choose the ad format that best suits your campaign objectives and creative assets. Common ad formats include:
Single Image: A straightforward format featuring one image. Ideal for simple, direct messaging.
Single Video: Allows you to use a video to convey your message. Useful for more engaging content and storytelling.
Carousel: Features multiple images or videos that users can swipe through. Great for showcasing different aspects of your services or multiple offers.
Collection: Combines images or videos with a product catalog, often used for e-commerce but can also be adapted for service promotions.
Review Format Options: Depending on your chosen format, ensure you have the right assets (images, videos, etc.) and that they meet Facebook’s specifications for dimensions, file sizes, and aspect ratios.
Confirm Selection: Once you’ve selected your ad format, review your choice to ensure it aligns with your campaign goals and creative strategy. Click “Continue” or “Next” to proceed with creating your ad.
By carefully selecting and reviewing your ad format, you ensure that your creative assets are utilized in the most impactful way. Whether you opt for a single image, video, carousel, or collection format, make sure it aligns with your campaign objectives and adheres to Facebook’s specifications. With your format chosen, you can confidently move forward with crafting your ad content.
Step 14: Create Your Ad
Creating your ad involves combining creative assets with compelling copy to capture the attention of your target audience. This step ensures that all elements are aligned with your campaign goals and effectively convey your message. By carefully uploading your media, crafting engaging text, and selecting a strong call-to-action, you can create ads that stand out and drive meaningful engagement:
Upload Your Creative Assets: Depending on the ad format selected, upload your images or videos. For instance:
Single Image or Video: Click on the “Add Media” button and upload your chosen file.
Carousel: Upload multiple images or videos for each card in the carousel.
Enter Ad Copy: Write compelling ad copy that aligns with your campaign objectives. Include:
Headline: A concise and attention-grabbing title.
Primary Text: The main body of your ad. Clearly articulate your value proposition and call-to-action (CTA).
Description: Additional information that complements the headline and primary text (optional but recommended).
Add Call-to-Action: Choose a CTA button that aligns with your campaign goal, such as “Learn More,” “Sign Up,” or “Contact Us.” This button encourages users to take the next step.
Preview Your Ad: Use the preview tool to see how your ad will look across different placements and devices. Ensure that all elements are displayed correctly and that the ad is visually appealing.
Review and Confirm: Double-check all ad elements, including creative assets, copy, and CTA. Make any necessary adjustments before finalizing. Click “Confirm” or “Publish” to submit your ad for review.
Once your ad is created, reviewing all elements ensures that your final product is polished and effective. From uploading media to crafting persuasive copy and adding a call-to-action, each step contributes to your ad’s success. By previewing and confirming your ad, you guarantee it meets Facebook’s standards and is ready to engage your audience effectively. Click “Confirm” or “Publish” to set your ad live and start driving results.
Step 15: Track and Analyze Ad Performance Metrics
After all your diligence setting up Facebook advertising for your firm, continuing to track and analyze the performance metrics of your campaign is essential to ensure your efforts aren’t in vain. By monitoring key metrics and comparing them against your campaign goals, you can gauge the effectiveness of your ads. This process helps you make data-driven adjustments, ensuring that your ads perform at their best and achieve the desired results:
Access Performance Metrics: In Ads Manager, go to the “Campaigns” tab to view performance metrics for your active campaigns. Click on the campaign name to see detailed performance data.
Monitor Key Metrics: Track essential performance metrics such as:
Impressions: How many times your ad was shown.
Clicks: The number of times users clicked on your ad.
Conversions: The number of desired actions taken (e.g., form submissions, website visits).
Cost Per Action: The cost associated with each conversion or action.
Analyze Data: Compare your ad performance against the goals you established earlier. Use insights from the data to evaluate which ads are performing well and which need adjustment.
Make Data-Driven Adjustments: Based on your analysis, adjust your campaign as needed. This might involve changing targeting options, revising ad copy, or reallocating your budget to higher-performing ads.
Generate Reports: Use the reporting features in Ads Manager to create detailed reports on your campaign’s performance. This helps in understanding trends, measuring ROI, and planning future campaigns.
Reviewing and analyzing performance metrics allows you to refine your ad strategy and improve campaign outcomes. By making informed adjustments based on data, you can enhance your ad performance, optimize your budget, and achieve better results. Generating detailed reports further aids in understanding trends and planning future campaigns, driving continued success in your advertising efforts.

Conclusion
No matter how long your firm has been in business, driving valuable leads and increasing your online visibility remains paramount. By following the steps outlined in this guide, you’re well on your way to leveraging the power of Facebook to reach potential clients and grow your firm.
Remember, crafting compelling ads and targeting the right audience are crucial to your success. However, this is an ongoing process- you’ll need to continually optimize for the best results. If you’re ready to take your Facebook advertising to the next level and need expert guidance, look no further than Comrade Digital Marketing. Our team specializes in helping legal professionals like you achieve outstanding results with their digital campaigns. Contact us today to see how we can help you make the most of your Facebook Ads strategy and dominate your local market!
Frequently Asked Questions
-
Can I run Facebook Ads for multiple practice areas?
Yes, you can run successful Facebook ads for multiple practice areas. To do so effectively, create separate campaigns or ad sets for each practice area. Tailor your ad copy, images, and targeting options to address the specific needs and interests of potential clients in each area. This approach allows you to optimize your ads based on performance and ensure that each practice area gets the appropriate attention.
-
Should lawyers target a broad or narrow audience?
Lawyers should generally target a more narrow audience when they create Facebook ads for their Facebook business page to improve ad relevance and efficiency. By focusing on specific demographics, interests, and geographic locations, you increase the likelihood of reaching individuals who are most likely to need your legal services. Narrow targeting helps reduce wasted ad spend and enhances engagement with potential clients who are actively seeking legal help.
-
How long should a lawyer’s Facebook ad campaign run?
The duration of a lawyer’s Facebook ad campaign depends on the campaign’s goals and budget. A good starting point is to run ads for at least 2-4 weeks to gather sufficient data and assess performance. This timeframe allows you to analyze metrics, adjust targeting and creative strategies, and determine the effectiveness of your ads. Regularly review and optimize your campaign based on these insights for the best results.
About the Author