As personal injury lawyers, your mission is to advocate for those who need it most. However, connecting with those who need your crucial help can be a challenge in an increasingly crowded market. Thankfully, with Facebook Ads, you can tap into a strategic solution to reach and engage potential clients directly where they spend a significant portion of their time—social media. With its robust targeting options and user-friendly platform, Facebook Ads can be a game-changer for your practice.
But where do you start? This guide is designed to demystify the process of launching your first Facebook Ads campaign, from setting up your account to designing eye-catching ads that drive results. Our experts at Comrade Digital Marketing will explore the essentials of targeting, budgeting, and optimizing your campaigns to ensure you get the most out of your advertising efforts. To ensure you can connect with those who are in critical need of your law expertise, continue with us as we share the power of Facebook Ads and how they can help boost your firm’s visibility and attract the clients you need.

What are Facebook Ads
Facebook Ads are a powerful advertising tool offered by Meta (formerly Facebook) that allows businesses and professionals to reach targeted audiences on Facebook and its associated platforms. These ads can appear in users’ News Feeds, Stories, and even within the right-hand column of Facebook on desktop. With advanced targeting options, advertisers can hone in on specific demographics, interests, and behaviors, ensuring that their ads reach the most relevant potential clients.
For personal injury lawyers, Facebook Ads can be particularly effective in generating leads and increasing visibility. By creating targeted campaigns, law firms can reach individuals who may be seeking legal representation for personal injury claims. The platform’s ability to segment audiences based on location, age, and interests allows lawyers to tailor their messages and offers, optimizing their advertising efforts and potentially increasing their client base.
Comrade Digital Marketing Agency can help you with the above if you’re unsure how to go about it. Schedule a free consultation.
Why Personal Injury Lawyers Should Use Facebook Ads
With the specificity and reach of Facebook Ads, personal injury lawyers have the opportunity to capture the attention of potential clients and build their practices’ visibility. With its robust targeting capabilities and cost-effective options, Facebook provides an ideal platform for personal injury lawyers to connect with their ideal audience. Here are seven compelling reasons why integrating Facebook Ads into your marketing strategy can lead to impressive results and boost your client base:
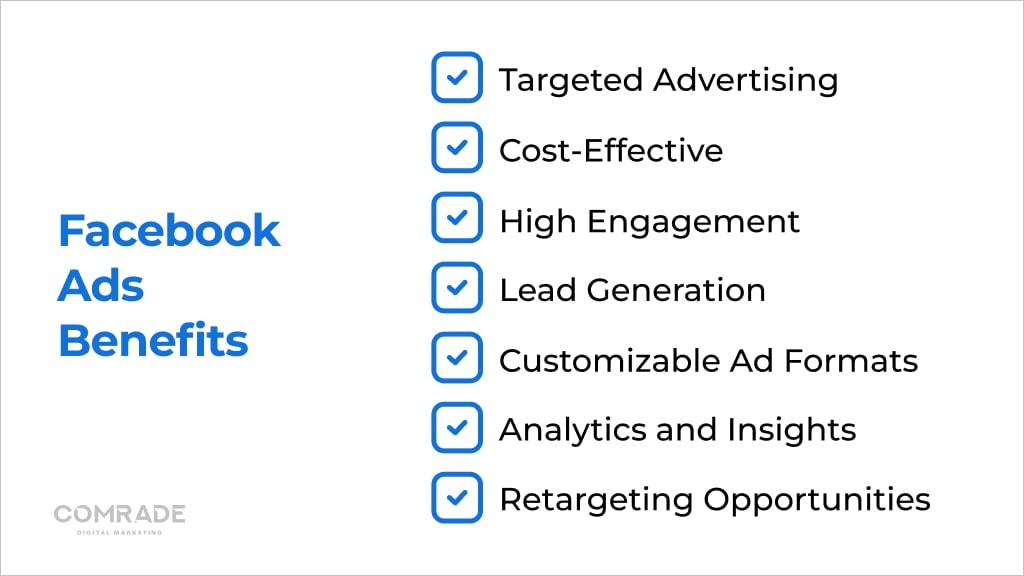
Targeted Advertising: Facebook’s advanced targeting options allow personal injury lawyers to reach specific demographics, interests, and locations, ensuring ads are seen by potential clients who need legal services.
Cost-Effective: Facebook ads can be more affordable than traditional advertising methods, offering flexible budget options and cost control.
High Engagement: Facebook’s platform fosters high engagement through likes, shares, and comments, increasing the visibility and reach of ads.
Lead Generation: Facebook Ads provide tools for capturing leads directly through ad forms, streamlining the process of collecting potential client information.
Customizable Ad Formats: Personal injury lawyers can use a variety of ad formats, including images, Facebook video ads, and carousel ads, to effectively communicate their message and showcase their expertise.
Analytics and Insights: Facebook provides detailed analytics on ad performance, allowing lawyers to track results, optimize campaigns, and make data-driven decisions.
Retargeting Opportunities: Lawyers can re-engage with users who have previously interacted with their instant experience ads or website, improving the chances of conversion and maintaining client interest.
Harnessing the power of successful Facebook Ads can transform your personal injury law practice by reaching the right people at the right time. From precise targeting to engaging ad formats, the benefits are numerous and impactful. By leveraging these opportunities, you can drive more leads, enhance your online presence, and ultimately grow your practice. By embracing Facebook Ads, you can watch as your client base flourishes with expert marketing efforts.
Step-by-Step Instructions for Creating Facebook Ads for Personal Injury Lawyers
Want to leverage the power of Facebook advertising to grow your personal injury law firm? Our comprehensive guide breaks down the process of creating effective Facebook ad campaigns tailored specifically for personal injury lawyers. We’ll show you how to target the right audience, design eye-catching ads, and measure your campaign’s success. Read on to learn the essential steps for setting up your first Facebook advertising campaign and attracting more clients to your firm.
Step 1: Set up Your Facebook Ads Manager Account
Setting up your Facebook Ads Manager account is the foundational step for launching effective ad campaigns. This process ensures you have everything in place to manage and monitor your advertising efforts. Follow these simple steps to create your account and get ready to drive results for your personal injury law practice:
Log In to Facebook: Start by logging into your personal Facebook account. If you don’t have one, you’ll need to create it first.
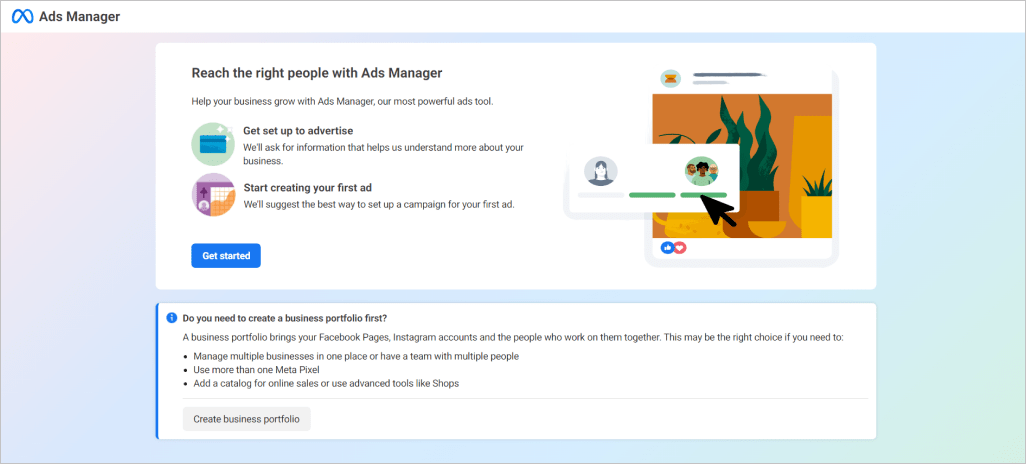
Access Ads Manager: Once logged in, go to the Facebook Ads Manager page. You can find it by clicking on the downward arrow in the top-right corner of your Facebook homepage, then selecting “Ads Manager” from the dropdown menu.
Set Up Your Business Account: If you’re using Ads Manager for the first time, you’ll be prompted to set up a Business Manager account. Click on the “Create Account” button and follow the prompts to enter your business name, your name, and your email address.
Enter Billing Information: To start creating ads, you need to set up your billing information. Go to “Payment Settings” within the Ads Manager, and enter your payment details. This ensures that your ads can be paid for and run without interruptions.
Verify Your Account: Facebook might require you to verify your account via email or phone. Complete this verification to fully activate your Ads Manager account.
Once you’ve completed these setup steps, your Facebook Ads Manager account will be ready to go. This solid foundation will allow you to start crafting targeted ads that reach potential clients effectively. By ensuring your account is properly set up, you’re now prepared to move forward and maximize the impact of your advertising campaigns.
Step 2: Initiate the Ad Creation Process in Facebook Ads Manager
Once you’re logged into Facebook Ads Manager, you’ll be greeted by a performance dashboard. This dashboard is your central hub where you can track all your campaigns, ad sets, and individual ads. Here, you’ll also find key metrics and results that show how well your ads are performing on your Facebook page. If you haven’t created any ads yet, this dashboard might look empty. No worries—this just means it’s time to get started!
To initiate the ad creation process, begin by selecting the type of ad you want to create.
The Ads Manager interface offers several options for creating a new campaign, ad set, or ad. Click on the green “Create” button located on the far left of these ad types. This will open up a new window where you can begin setting up your ad, including defining your objectives, targeting your audience, and designing your creative. Taking this step will set you on the path to crafting effective Facebook ads tailored to your personal injury law practice.
Step 3: Select the Buying Type for Your Campaign
Choosing the right buying type for your successful Facebook ad campaign is crucial for optimizing your budget and achieving your goals. This step involves selecting between the “Auction” and “Reach and Frequency” options, each offering different advantages. Understanding these options will help you control your spending and ensure your ads reach the right audience effectively:
Navigate to Buying Type: Within the campaign setup page, find the section labeled “Buying Type.” This is where you select how you want to pay for your ads.
Select Buying Type: Facebook offers two main buying types: “Auction” and “Reach and Frequency.”
Auction: This is the most common buying type, where you bid for ad space against other advertisers. It’s ideal if you want flexibility and control over your ad spending.
Reach and Frequency: This option allows you to plan your campaign’s reach and frequency in advance. It’s useful for ensuring your ads are seen by a specific number of people.
Set Bid Amount: If you choose the Auction type, you’ll need to set a bid amount or let Facebook automatically optimize your bid. Click on “Continue” to apply your choice and move forward in the ad creation process.
After selecting your buying type, you’ll be equipped to move forward with crafting your ad campaign. Whether you opt for the flexibility of Auction or the predictability of Reach and Frequency, this choice will shape how your ads are delivered and how your budget is managed. With this step completed, you’re one step closer to launching a successful ad campaign.
Step 4: Determine the Objective of Your Advertisement
Defining the objective of your advertisement is a critical step in setting up your Facebook ad campaign. This decision will guide how your ads are designed and what actions they aim to achieve. Understanding the available campaign objectives will help you select the one that aligns with your marketing goals, ensuring your ads are effective and targeted:
Access Campaign Objectives: After clicking “Continue” from the previous step, you’ll be directed to the “Campaign Objective” page. This is where you’ll select the primary goal of your ad campaign.
Understand Available Objectives: Facebook categorizes objectives into three main types:
Awareness: Focuses on generating interest in your product or service. Examples include Brand Awareness and Reach.
Consideration: Aims to engage users who are interested in learning more. Examples include Traffic, Engagement, and Video Views.
Conversion: Drives specific actions such as purchases or sign-ups. Examples include Conversions, Catalog Sales, and Store Traffic.
Select Your Objective: Click on the objective that best matches your goals. For instance, if you want to drive traffic to your website, choose the “Traffic” objective. If your goal is to increase conversions, select “Conversions.”
Confirm Your Choice: After selecting your objective, click “Continue” to proceed to the next step in setting up your ad.
Choosing the right campaign objective sets the direction for your Facebook ads and ensures that your efforts are aligned with your business goals. By selecting an objective that matches your aims, you’ll be better equipped to craft ads that drive the desired actions. With this step completed, you’re ready to move on and fine-tune your campaign for success.
Step 5: Give Your Campaign a Name
Naming your campaign effectively is essential for managing and tracking its performance. A clear, descriptive name helps you quickly identify the campaign’s purpose and target audience. Following a consistent naming convention will also make it easier to monitor and compare results across multiple campaigns, ensuring better organization and strategic insights:
Enter Campaign Name: In the campaign setup section, you’ll see a field labeled “Campaign Name.” Click on this field to enter a name that reflects the purpose of your campaign.
Use Descriptive Names: Choose a name that includes relevant details, such as the target audience or the specific offer. For example, “PI Lawyer Ad – Summer Promotion” provides a clear idea of the campaign’s focus.
Consider Naming Conventions: If you run multiple campaigns, establish a naming convention that includes key elements like the campaign objective, audience, or timeframe. This helps in easily identifying and comparing performance across campaigns.
Review and Save: After entering the campaign name, review it to ensure it accurately represents your campaign goals. Click “Save” or “Continue” to proceed to the next setup phase.
By giving your campaign a descriptive and consistent name, you set the stage for streamlined management and performance tracking. This thoughtful approach will aid in evaluating your campaign’s effectiveness and facilitate easier navigation through your ad campaigns. Once named, you’re ready to advance to the next steps in building a successful ad strategy.
Step 6: Implement A/B Split Testing if Needed
Implementing A/B split testing is a powerful way to optimize your Facebook ad campaigns. By testing different elements of your ads, you can determine which variations perform best and refine your strategy for maximum impact. Follow these steps to set up your A/B tests and gather valuable insights to enhance your ad performance:
Find A/B Testing Option: On the campaign setup page, locate the option for “A/B Testing” or “Test and Learn.” This may be under the “Campaign” or “Ad Set” settings.
Enable A/B Testing: Toggle the switch or check the box to enable A/B testing. You might be prompted to select the elements you want to test, such as ad copy, images, or targeting options.
Define Variables: Choose the specific variables you want to test. For instance, you can test different ad headlines, call-to-action buttons, or images to determine which resonates best with your audience.
Set Testing Parameters: Define how long you want the test to run and how you want to allocate your budget across different versions of the ad.
Start the Test: Click “Create Test” or “Start Test” to launch your A/B split test. Facebook will run the test and provide results based on the performance of each ad version.
Enabling A/B split testing allows you to make data-driven decisions about your ad elements and improve overall campaign effectiveness. By analyzing the results, you can identify what works best for your audience and refine your approach accordingly. With the test complete, you’ll be better positioned to create high-performing ads that drive better results for your personal injury law practice.
Step 7: Define Your Performance Goals for the Campaign
To best guide the success of your Facebook ad campaign, it’s essential to define your performance goals. This stage involves selecting specific metrics and outcomes you want to achieve, ensuring your ads are aligned with your overall objectives. By setting clear performance goals, you can better measure and optimize your campaign’s effectiveness:
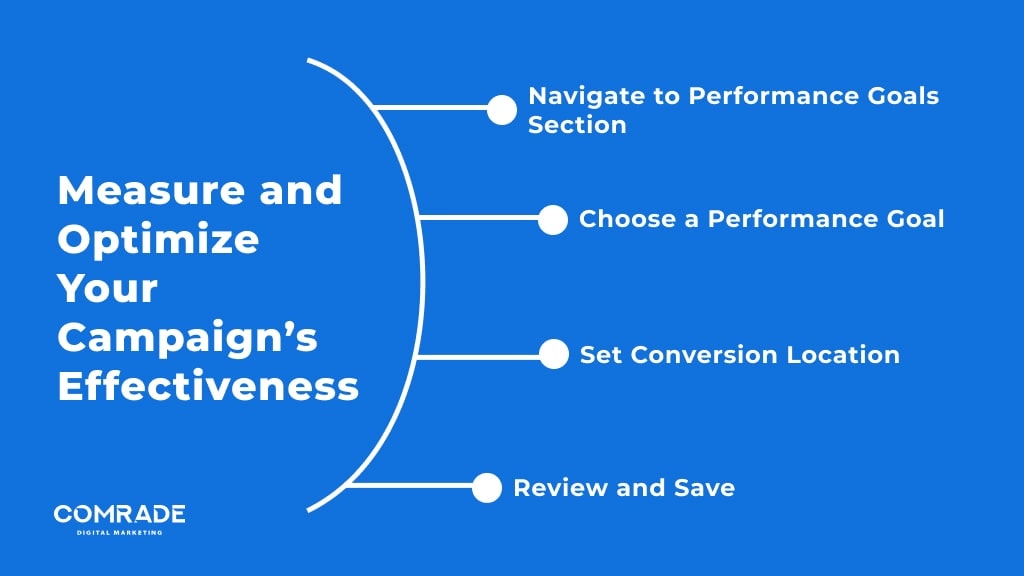
Navigate to Performance Goals Section: After selecting your objective and setting up A/B testing, you’ll find the “Performance Goals” section. This is where you define what you want to achieve with your ad campaign.
Choose a Performance Goal: Facebook provides several performance goals based on your campaign objective. Select the one that aligns with your desired outcome:
Maximize the Number of Link Clicks: If your primary goal is to drive traffic to your website or app, select this option. It aims to generate as many clicks as possible.
Maximize Daily Unique Reach: Choose this goal if you want to ensure your ad reaches a broad audience, with each user seeing your ad only once per day.
Maximize the Number of Conversions: If you aim to drive specific actions like form submissions or purchases, this goal is ideal. It focuses on getting users to complete the desired actions.
Maximize the Number of Impressions: Select this if your goal is to increase brand awareness by showing your ad to as many people as possible, regardless of frequency.
Set Conversion Location: If your goal involves conversions, you need to choose a conversion location where users will complete the action:
Website: For driving traffic to your website.
Mobile App: For encouraging users to download or engage with your app.
Calls: To prompt users to call your business directly.
Instagram Profile: If you want to direct traffic to your Instagram profile.
Review and Save: After setting your performance goals and conversion location, review your selections to ensure they align with your overall campaign objectives. Click “Save” or “Continue” to move on to the next step.
Once you’ve set your performance goals, you’re well-positioned to track and assess your campaign’s success. Whether you aim to drive traffic, increase conversions, or boost brand awareness, clearly defined goals will help you measure progress and make informed adjustments. With this step completed, you’re ready to proceed to the next phase of your ad campaign setup.
Step 8: Decide on Your Budget and Set a Schedule
Determining your budget and setting a schedule are key steps in managing your Facebook ad campaign effectively. This process allows you to control your spending and time for your ads to reach your audience at the most optimal moments. Follow these steps to establish a budget and schedule that aligns with your campaign goals and ensure your ads run smoothly:
Access Budget and Schedule Settings: On the “Budget and Schedule” page, you’ll set how much you want to spend and when you want your ads to run.
Set Your Budget:
Daily Budget: Choose this option if you want to set a maximum amount you’re willing to spend per day. Facebook will distribute your budget evenly across each day of the campaign.
Lifetime Budget: Opt for this if you want to set a total amount for the entire campaign duration. Facebook will adjust your daily spend to ensure you stay within your lifetime budget.
Define Your Schedule:
Run Ads Continuously: Select this if you want your ads to run continuously from the start to the end of the campaign period.
Set a Start and End Date: Choose specific start and end dates for your campaign. Enter the dates in the “Start Date” and “End Date” fields. This option allows you to target specific times or dates.
Optimize for Ad Delivery: Depending on your performance goals, you may have options to optimize your ad delivery. For example, if you’re maximizing clicks, Facebook will aim to get you the most clicks for your budget.
Review and Confirm: After setting your budget and schedule, review your selections to ensure they align with your goals and financial limits. Click “Save” or “Continue” to proceed to the next step.
By finalizing your budget and schedule, you’re ensuring that your ad campaign is financially managed and timed effectively.
This careful planning helps you stay within your budget while reaching your audience at the right times. With these settings in place, your campaign is poised for success as you move forward to the next stages of ad creation and optimization.
Step 9: Specify Your Target Audience
With every ad you create, you want to ensure you’re reaching your ideal target audience. This is why it’s essential to specify your target audience when implementing Facebook ads. By defining your audience based on location, demographics, interests, and behaviors, you can ensure your ads are seen by those most likely to engage. Follow these steps to fine-tune your audience and enhance the effectiveness of your ad campaign:
Access Audience Settings: On the “Audience” page, you’ll define who will see your ads based on various criteria.
Define Your Audience:
Location: Select the geographic locations where you want your ad to appear. You can choose countries, states, cities, or even specific postal codes.
Age and Gender: Set the age range and gender of your target audience. This helps tailor your ad to the demographics most relevant to your business.
Interests: Use interest-based targeting to reach people who have shown interest in topics related to your services. For example, if you’re advertising for personal injury lawyers, you might target users interested in legal services or personal injury topics.
Behaviors: Target users based on their behaviors, such as purchase history or device usage. This helps reach individuals more likely to engage with your ad.
Create Custom Audiences: You can also create custom audiences from your existing contacts, website visitors, or app users. Go to the “Custom Audiences” section and upload your data or integrate with Facebook’s tracking tools to define these audiences.
Use Lookalike Audiences: To expand your reach, create lookalike audiences based on your existing customers. Facebook will find users similar to those who have already engaged with your business.
Review and Save: After defining your audience, review your settings to ensure they match your campaign goals. Click “Save” or “Continue” to move on to the next step.
Once you’ve specified your target audience, your ads will be positioned to reach individuals who are most relevant to your personal injury law practice. This targeted approach enhances the efficiency of your campaign and improves the likelihood of engaging potential clients. With your audience defined, you’re ready to proceed and further refine your ad strategy.
Step 10: Choose Where Your Ad Will Appear
To further target your ideal audience, you must choose where your ad will appear. Facebook offers flexibility through Automatic and Manual Placements, allowing you to optimize your ad’s reach. Whether you want Facebook to place your ads for you or prefer to select specific locations, this step ensures your ads are shown in the most impactful spaces across Facebook’s network:
Navigate to Placement Options: In the ad set creation phase, go to the “Placements” section. This is where you choose where your ads will appear across Facebook’s network.
Automatic vs. Manual Placement: Decide between “Automatic Placements” or “Manual Placements”:
Automatic Placements: Facebook will automatically place your ads across its network of platforms (Facebook, Instagram, Messenger, Audience Network) based on where they are likely to perform best.
Manual Placements: If you prefer more control, choose “Manual Placements” to select specific locations where you want your ads to appear. You can pick from options like the Facebook News Feed, Instagram Stories, or the right column of Facebook.
Select Specific Placements: If you opt for Manual Placements, check the boxes next to the desired locations. For personal injury lawyers, you might choose to focus on Facebook News Feed and Instagram Stories to reach users in high-engagement areas.
Review Placement Strategy: Ensure your selected placements align with your campaign objectives and audience. Click “Save” or “Continue” to apply your placement choices and proceed with the ad setup.
Selecting the right placements for your ads can significantly impact their performance and visibility. By carefully choosing between Automatic and Manual Placements, and selecting the most relevant locations, you ensure that your ads reach the right audience in high-engagement areas. With your placements finalized, you are ready to move on to the final steps of creating and launching your ad campaign.
Step 11: Configure the Ad Setup
Now that you’ve crafted your campaign and set up the ad sets, it’s time to dive into configuring your ads. Begin by setting up your Meta account, which involves linking your Facebook account with Instagram if desired. This connection allows you to display your ads not only on Facebook but also on your Instagram feed or in stories, broadening your reach and enhancing engagement.
Next, you’ll need to decide whether to use an existing post or create a new ad from scratch. Facebook provides an option to choose from your current posts, which can be a quick way to leverage content that has already resonated with your audience. Alternatively, you can craft a new ad specifically designed to meet your campaign goals.
A valuable tool at this stage is Facebook’s new creative mockup feature. This allows you to design and preview various ad mockups to test which version performs best with your audience.
By experimenting with different formats and styles, you can fine-tune your approach to better align with what resonates most with potential clients.
Step 12: Pick the Format for Your Ad
With every Facebook advertising campaign, you want to ensure your ads are understandable and digestible for the clients you’re looking to reach. A big factor in this is the ad format, which can make your Facebook campaign noticeable and better reach your desired audience effectively. Facebook provides several format options, each tailored to different marketing needs. By selecting the format that best aligns with your campaign goals and audience preferences, you’ll be able to create engaging ads that drive results. Let’s explore the available formats to find the perfect fit for your personal injury law practice:
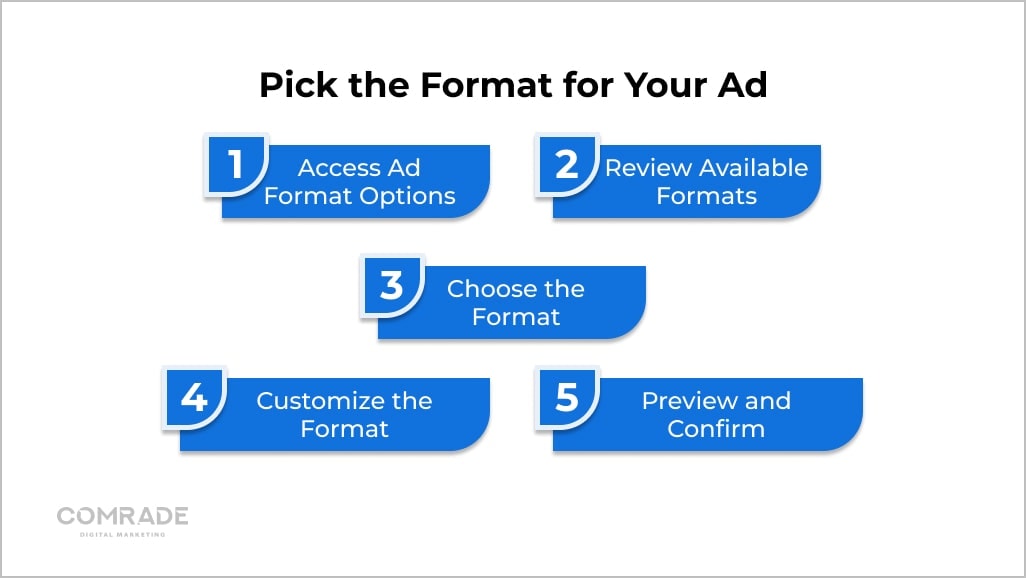
Access Ad Format Options: During the ad creation process, find the “Ad Format” section. This is where you can choose how your ad will be displayed.
Review Available Formats: Facebook offers several ad formats:
Single Image: Ideal for straightforward, high-impact messaging. Use high-quality images to capture attention.
Video: Engages viewers with dynamic content. Videos are effective for showcasing your services, sharing testimonials, or explaining complex concepts.
Carousel: Allows multiple images or videos in a single ad. Each card can have its own link, making it useful for highlighting various services or aspects of your practice.
Collection: Features a combination of images or videos and a product catalog. Best for showcasing multiple services or offers in a visually engaging way.
Choose the Format: Select the format that best fits your campaign objective and audience preferences. For example, if you want to demonstrate different aspects of your legal services, a Carousel format may be most effective.
Customize the Format: Depending on your choice, upload the required media and add any necessary text or links. Ensure the format aligns with your ad’s message and provides a clear call-to-action.
Preview and Confirm: Review how your ad format looks across various placements to ensure it is visually appealing and effective. Click “Confirm” or “Continue” to apply your chosen format and move forward with ad creation.
The right ad format is fundamental to creating persuasive and high-performing Facebook ads. Whether you choose a single image, video, carousel, or collection format, ensure it aligns with your campaign objectives and engages your audience. Once you’ve customized your format and reviewed how it appears, you’re ready to proceed with confidence and launch an ad that effectively promotes your personal injury law services.
Step 13: Create and Finalize Your Advertisement
Creating and finalizing your advertisement is the crucial final step in launching your Facebook ad campaign. This is where you’ll craft your ad copy, choose a compelling call-to-action, and ensure all links and tracking parameters are properly set. By focusing on these elements, you can create an effective ad that engages your audience and drives them to take action, ultimately helping you achieve your campaign objectives:
Enter Ad Text: Add the primary text, headline, and description to your ad. Craft compelling copy that captures attention and conveys your message clearly. For personal injury lawyers, highlight key benefits, such as experience or unique selling points, and use a strong call-to-action (CTA) to encourage potential clients to reach out.
Add Call-to-Action Button: Choose an appropriate CTA button, such as “Learn More,” “Contact Us,” or “Get Quote,” based on your campaign objective. This button should prompt users to take the next step, like visiting your website or contacting your firm.
Configure Links: If your ad includes links, ensure they are correctly set up. Verify that the links direct users to relevant landing pages or contact forms that align with your ad’s message.
Set Tracking Parameters: If applicable, add UTM parameters to your links to track performance and gather insights on how users interact with your ad. This will help in analyzing the effectiveness of your campaign.
Finalize and Publish: Once you’re satisfied with the ad’s appearance and content, click “Publish” to submit your ad for review. Facebook will review the ad to ensure it meets their guidelines before it goes live.
With your ad text, call-to-action, and tracking parameters set, you’re ready to finalize and publish your ad. This final review ensures that your ad is well-crafted and ready for Facebook’s approval. Once published, your ad will start reaching potential clients, and you’ll be able to monitor its performance and effectiveness. This step brings your campaign to life and sets you up for success in attracting new clients.
Step 14: Review and Monitor Your Ad’s Performance Metrics
No matter what style of Facebook advertising you employ, it’s essential to monitor your ad’s performance to understand its effectiveness and continue to optimize your campaign. By reviewing key metrics in Ads Manager, you can gauge how well your ad is performing and make informed decisions. This ongoing analysis will help you refine your strategy, improve results, and ensure that your ad campaign achieves its objectives:
Access Ads Manager: Go back to the Ads Manager dashboard where you created your campaign. Click on the campaign you want to monitor.
Review Key Metrics: In the campaign overview, check key performance metrics such as:
Impressions: The number of times your ad was shown.
Clicks: The number of times users clicked on your ad.
CTR (Click-Through Rate): The percentage of people who clicked on your ad after seeing it.
Conversions: The number of completed actions, like form submissions or phone calls.
Analyze Performance Data: Use the performance data to evaluate how well your ad is meeting your goals. Compare actual performance against your set targets to identify areas for improvement.
Adjust and Optimize: Based on the performance metrics, make necessary adjustments to your ad. This might include changing ad copy, adjusting your target audience, or reallocating your budget to better-performing ads.
Generate Reports: For detailed analysis, generate performance reports within Ads Manager. Use these reports to track trends, measure ROI, and make informed decisions for future campaigns.
Continuous Monitoring: Regularly check the performance of your ad to ensure it continues to meet your objectives. Adjust your strategy as needed to optimize results.

Regularly reviewing and analyzing your ad’s performance metrics enables you to fine-tune your campaign and maximize its effectiveness. By making data-driven adjustments and generating detailed reports, you ensure that your ad continues to meet your goals and delivers a strong return on investment. Staying engaged with performance monitoring helps you adapt and succeed in your Facebook advertising efforts.
How Much I Should Budget for Facebook Ads for My Personal Injury Law Firm
When budgeting for Facebook Ads for a personal injury law firm, it’s important to start with a realistic range based on your firm’s size and goals. For a small to medium-sized firm, allocating $500 to $1,500 per month is a good starting point. This budget allows for consistent ad exposure and data collection, helping you gauge the effectiveness of your campaigns. By investing around $500, you can run a moderate number of targeted ads, while $1,500 will enable more extensive testing and optimization, reaching a larger audience and potentially generating more leads.
For larger firms or those looking to aggressively expand their reach, a monthly budget of $2,000 to $5,000 is advisable. This higher budget supports more comprehensive campaigns, including retargeting strategies and advanced audience segmentation. With this investment, you can leverage Facebook’s ad tools more effectively, running multiple ad variations and optimizing based on performance metrics. This approach not only increases your firm’s visibility but also enhances lead quality, ensuring your advertising dollars are spent efficiently.

Conclusion
Nearly every potential client has a Facebook, and it’s time you reach them where they are scrolling daily. By mastering Facebook ads for your personal injury law firm, you can significantly boost your visibility and attract high-quality leads. However, the journey doesn’t end here; optimizing your campaigns and analyzing results will be key to your ongoing success. If you’re looking to turn your Facebook ads into a powerful tool for client acquisition, Comrade Digital Marketing is here to help.
Our expert team has a proven track record of creating and managing successful ad campaigns for personal injury lawyers. We understand the nuances of the legal industry and know how to craft messages that resonate with your target audience. Don’t navigate this complex landscape alone—reach out to us today for a consultation. Let’s work together to transform your advertising efforts into a client-generating powerhouse. Contact Comrade Digital Marketing now to see how we can optimize your Facebook advertising for unparalleled reach.
Frequently Asked Questions
-
Can I use Facebook Ads for local targeting?
Yes, you can use Facebook Ads for local targeting. By leveraging your Facebook Business Page, you can set specific geographic parameters like city, state, or a radius around a particular address. This feature is particularly beneficial for a personal injury lawyer aiming to connect with potential clients in their immediate area. Additionally, Facebook Ads allows you to refine your audience based on demographics, interests, and behaviors, ensuring your ads are targeted effectively. For broader reach, you might also consider using Google Ads in conjunction with Facebook Ads to capture a wider audience.
-
How do I handle negative comments or reviews on my ads?
Respond to negative comments or reviews with professionalism and empathy. Address the concern directly and offer to resolve the issue privately, if possible. Acknowledge the feedback, apologize if necessary, and provide a solution or corrective action. This approach shows potential clients that you handle criticism constructively and care about client satisfaction. Avoid engaging in public arguments and consider monitoring your ads regularly to manage feedback promptly.
-
What are the common mistakes to avoid with Facebook Ads?
Common mistakes include targeting too broadly or too narrowly, leading to wasted ad spend or missed opportunities. Failing to use compelling visuals or clear calls to action can reduce engagement. Additionally, not tracking ad performance or neglecting to adjust campaigns based on data can hinder results. Ensure your ads are optimized for mobile devices and test different ad formats and audiences to find what works best for your specific goals.
About the Author